> For the complete documentation index, see [llms.txt](https://fanx.gitbook.io/fanx-docs/llms.txt). Markdown versions of documentation pages are available by appending `.md` to page URLs; this page is available as [Markdown](https://fanx.gitbook.io/fanx-docs/fanx-user-guide/add-liquidity.md).
# Add liquidity
**What is add liquidity?**
"Adding liquidity" refers to the process of depositing tokens into a liquidity pool on a decentralized exchange (DEX) or platform. By doing this, users (called liquidity providers) supply the pool with the necessary tokens that other traders can swap between. For example, if you want to add liquidity to an BAR/CHZ pool, you deposit both BAR and CHZ in equal value. In return, you receive liquidity provider (LP) tokens, which represent your share of the pool. You earn a portion of the transaction fees from trades made using the pool. When you withdraw, you'll receive your initial tokens back, plus any fees you've earned.
### **How to add liquidity?**
To add liquidity to FanX, here’s a step-by-step guide.
**Prerequisite**
In order to add liquidity you need to have these:
1. A MetaMask wallet or any other Web3 wallet.
2. You need to have CHZ on Chiliz Chain in your wallet for the gas fee.
3. When adding liquidity to an existing pool, make sure you have two different assets.
### **Step-by-Step Guide**
1. Go to: and Connect Wallet, refer to [this page](https://app.gitbook.com/o/qMzScKT0sjHHDDrav65V/s/6nMCuiBX7YfVJ4DbM0Fy/~/changes/10/fanx-user-guide/adding-chiliz-chain).
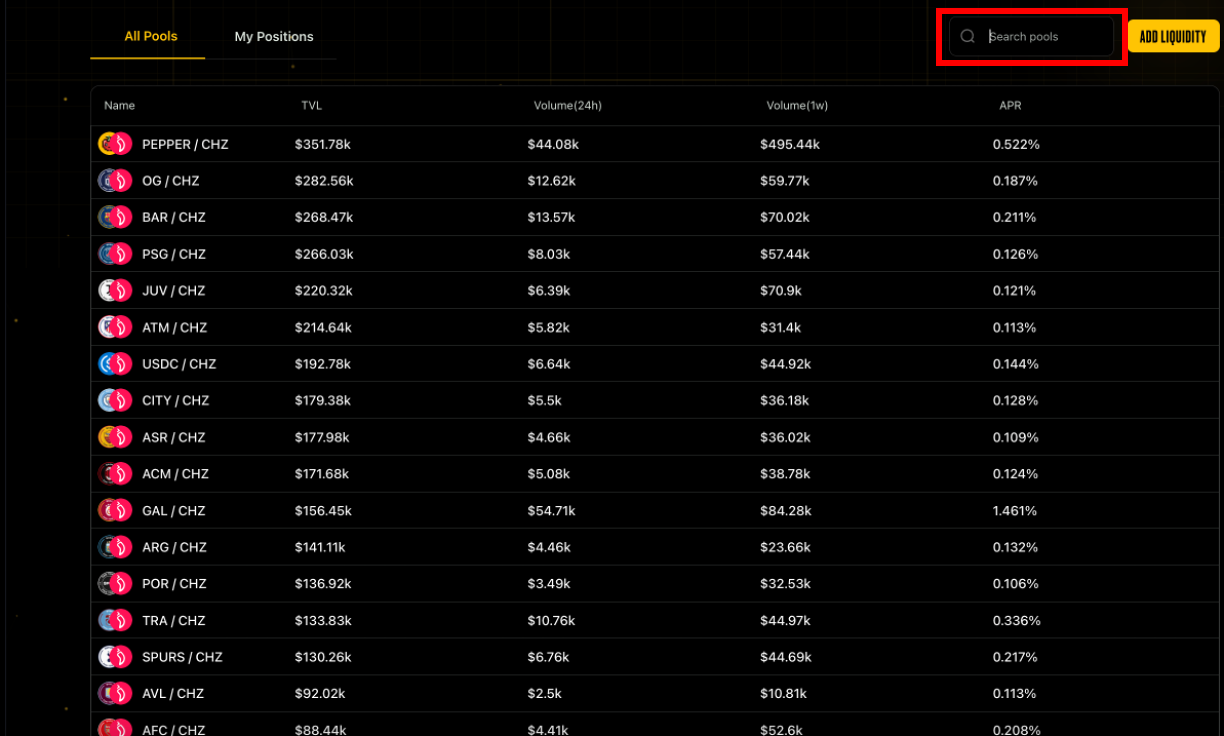
2. You can find the pool you want to add liquidity to by typing in the "Search pools" section. Once you find the liquidity pool, please click on it.
3. Determine the amount you want to add to the pool and click the "ADD LIQUIDITY" button.
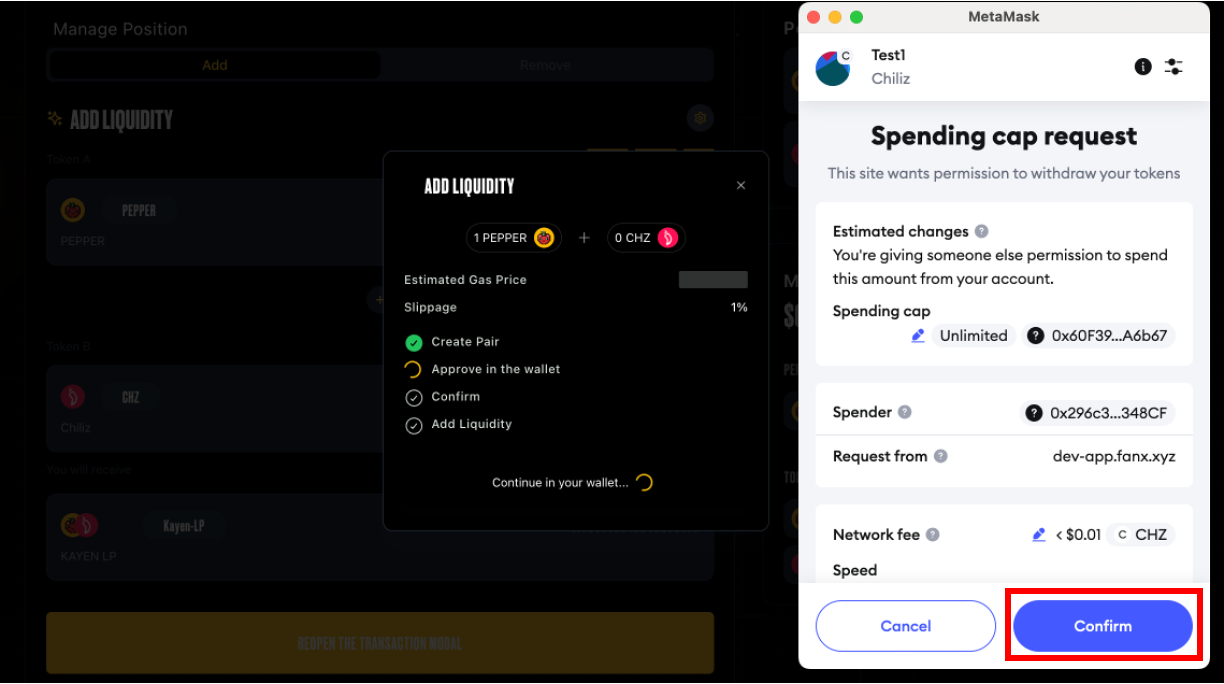
4. Set a spending cap for your token. Spending cap should be more than the amount you plan to add to liquidity.
5. Continue by clicking 'CONFIRM ADDING LIQUIDITY.' *Also you can see the estimated gas price and slippage rate here.*
6. Click on Confirm.
7. Your transaction has been completed.
8. After adding liquidity you can view your position on the same page.